If you’ve ever been camping, you must’ve surely noticed the starry blanket in the sky during the night.
If you had to think about a family activity in which everyone could participate and enjoy, the chances are someone would put forward stargazing and astronomy.
There is never a dull moment when a group of amateur astronomers looks up at the sky on a camping trip.
That’s because the heavens are blazing back at their observers with electromagnetic radiation from over 5,000 stars.
An exciting new activity is fast becoming one of America’s favorite pastimes: Astronomy and Stargazing. You’ll want to make sure that you get binoculars to take in the sights, so do some research and invest in a good pair. Once you’ve got one, you’ll be gazing at stars on all your future camping trips.
But I stray… I have to teach you guys and gals how to appreciate the sky’s starry blanket like a real bunch of professionals.
Here’s your guide on how to become a successful stargazer!
Stars: They Are Waiting for You to Discover Them
It’s more difficult to see stars in urban areas. This is because the light pollution created from artificially generated sources, such as street lights, shopping mall parking lots, and office buildings, all compete with starlight to catch your eye. On a family outing or camping trip, nothing beats the ritual of setting up your equipment telescope and gathering around to take turns looking out at the Milky Way in all its glory.
Why Camping is the Ideal Activity for Astronomy
The United States is fortunate enough to accommodate 36 official International Dark Sky Parks. What qualifies a section of land as a Dark Sky Park is when it has access to skies possessing a high quantity of starry nights as well as a nocturnal environment specifically protective of the following qualities:
- Public enjoyment
- Cultural heritage
- Educational, scientific, and natural facilities
When an area ticks all of these boxes, it earns special protection and status. Some of the most well-known national monuments and parks – Joshua Tree, Craters of the Moon, and the Grand Canyon – are listed as Dark Sky Parks.
Camping takes families and groups away from the city lights and into areas where it is quiet and dark. These are two essential components of successful stargazing because there is no noise or light source to distract you by taking your eyes off the skies. This enables all stargazers the opportunity to look for those elusive shooting stars and meteor showers without distraction.
So get out of your tent, bust out your stargazing equipment and pull up a chair. Or, if you’re hell bent on being completely horizontal so you can take in the Universe’s breathtaking view in full glory, a cot or a hammock.
What Happens If You Need to Set up Your Telescope Away from the Campsite?
Not every campsite is adapted for ideal stargazing conditions. There might be a light source or there can be other campers around who don’t have astronomy on their agenda. So, the best thing is to do is head out to a place that provides your darkness and silence.
Here are some useful items to take with you and some tips for setting up.
- If you want to make astronomy a long term outdoor activity, it would be nice to invest in a pair of good quality binoculars in addition to the telescope. One person can use the binoculars while another is busy with the telescope. High-resolution images of the moon can be seen with a quality pair of binoculars.
- Keep your night vision going by using a red flashlight. They are easily available and come in handy for searching for items while keeping your eyes adapted for the dark. Get some red LED lights for the tripod legs so no one trips over them when they are splayed out.
- Warm-up those chilly nights with a high-grade tent heater.
- Lens cleaner tools are important for cleaning your optics if it gets dusty or windy. A specially made optical lens brush is the only tool for clearing the lens.
- Only buy a tripod with built-in level legs.
- You can get astronomy apps for your smartphone.
- Don’t forget to bring something to cover the ground if you want to lay down, and some folding camp stools. Not everyone wants to stand to look at the stars all night.
- If you plan on stargazing for most of the night, don’t forget to pack spare batteries for the telescope.
- Bug spray and water for summer/Hand warmers, heat wraps, blankets for winter.
When is the Best Time to Go Stargazing?
The best time of the month to go stargazing in on a clear and moonless night. This means that the moon must look as close to a thin fingernail paring as possible. This is called a gibbous phase or crescent moon. The new moon phase is also a good time for astronomy.
Check your weather app to see what the forecast will be for the Dark Sky Park campsite where you want to go. There are also calendars that list all of the annual astronomical events:
- Meteor showers
- New moon
- Eclipses
- Star calendar
First Constellation You Should Look for
Astronomy 101 involves finding and recognizing the Big Dipper/North Star. If your camp is north of Little Rock, AR, you can find this constellation on any day of the year. If you are further north of New York, the Big Dipper will never fall below your horizon, and you will be able to see it all night when the sky is clear.
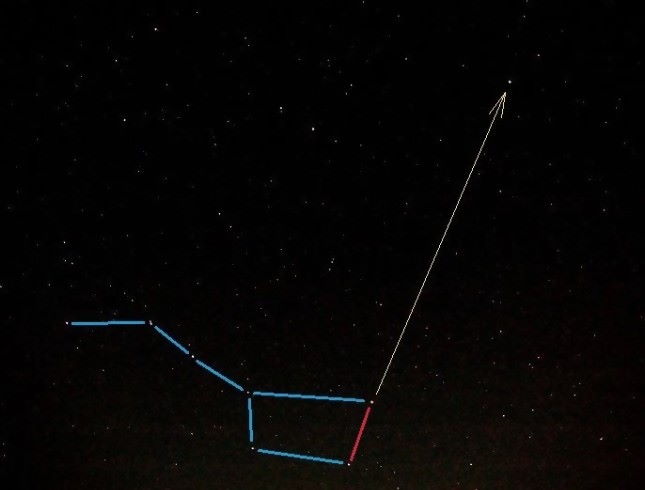
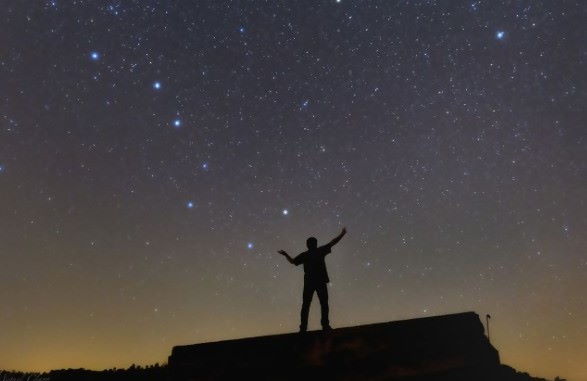
How to Find the Big Dipper: Face the northern horizon, and look for a group of bright stars that follow a definite path from left to right in a gentle curve down, and then up again. It’s easiest to start by looking for the beginning of the Big Dipper “handle” first, and then follow the handle curve down to the “dipper”.
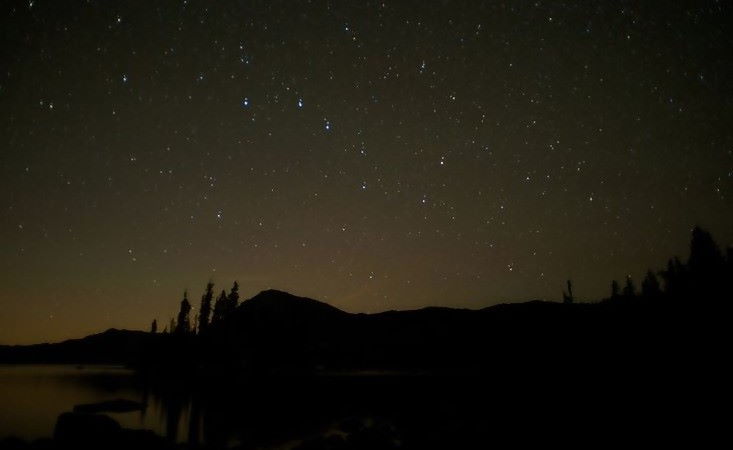
Once you’ve located the Big Dipper, you can use it to find the North Star.
And a real life photo, just to make it as clear as I possibly can:
What Telescope Should You Use?
Never has the expression, “You get what you pay for” more applicable than when it comes to telescopes. Think about what you want to be able to see through your telescope and then buy one that allows you to do that. Some of the celestial bodies you will probably want to see are:
- Moon
- Planets
- The sun
- Comets
- Meteor shower and shooting stars
- Double stars
- Light pollution
The aperture of the telescope defines the amount of light the object can gather, the maximum resolution, and magnification. There are three telescope categories; if you have already been exposed to astronomy using a cheap telescope or a large, expensive one, this may have persuaded you as to which model telescope to buy and which ones to stay away from!
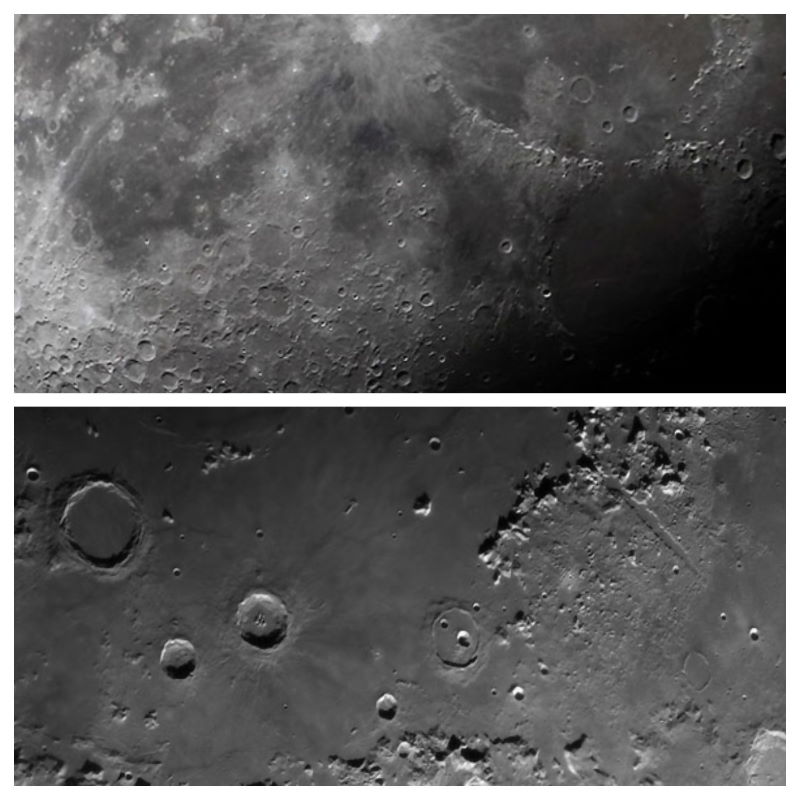
Another example:
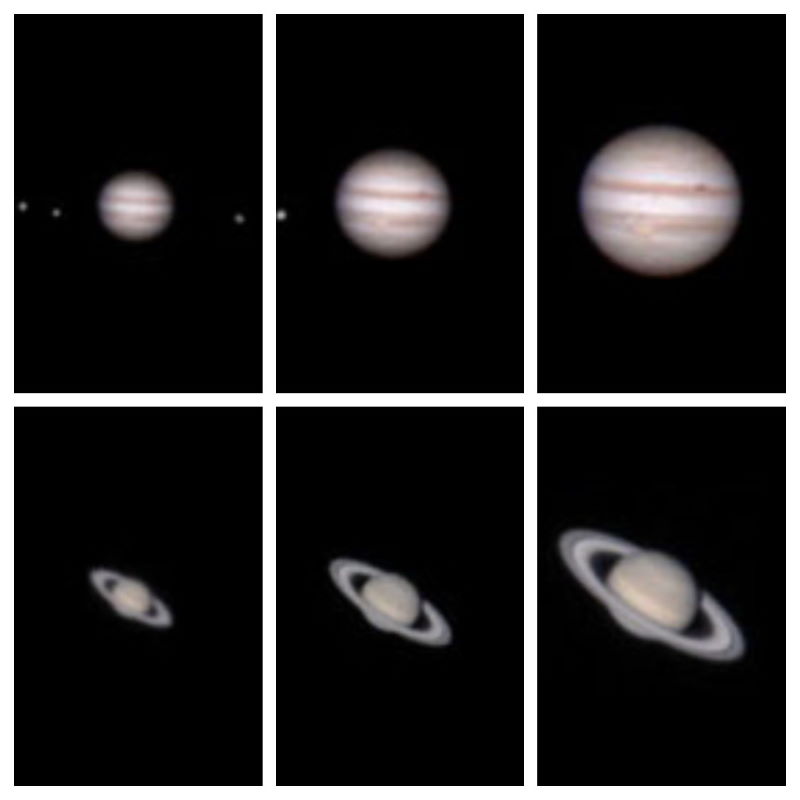
As can be seen on these images, the higher the price of a telescope, the more details can be seen in the image. To see the planets in better detail, your telescope must be high quality, properly collimated, and sufficiently cooled. These are steps that aren’t hard to learn how to do and will give you an over-all better quality image.
Why Do Stars Twinkle and Planets Don’t?
Stars twinkle because of astronomical scintillation caused by the earth’s atmosphere. Diffraction occurs because the light being emitted by the star is bounced around in the atmosphere before catching our eye. These light waves also diffract when passing through different temperatures and air pockets.
Planets don’t twinkle because they are larger than the air pockets that can distort light beams. An interesting fact: if you look at stars out of the corner of your eye, and not at them directly, they grow brighter. This is because the color receptors in your eyes are concentrated around your retina, the eye area used when you look at an object directly. If you look at the stars from an angle and not at them directly, they grow brighter because you are using the section of your eye with only black and white receptors. In the dark, everything appears in black and white monochromes, so using the part of your eye dedicated to monochromes gives you better eyesight.
Astronomy, stargazing, and camping are exciting activities, and something the whole family can do. Nothing beats the thrill of camping outdoors and the beauty of seeing the galaxies around our beautiful planet: Earth.

0 comments